Plucky - The Alternative Electric Guitar
The initial idea for my physical computing project was to create a simple stringed instrument which could be controlled by the user via pushbuttons. The inputs at this stage will be quite basic and consist of three push-buttons – one push-button will make a motorized ‘plectrum’ pluck a string; one button will move a motor clockwise to tension a string – increasing the pitch, and the third button will move a motor anti-clockwise – decreasing the pitch of the string.
produced by: David Williams
Inspiration
The inspiration for this project initially came an experience of seeing some live music which utilised stringed instruments. I wondered if I could simplify the design of a guitar and make something quite small. This would mean eradicating the fret-board (hence tensioning the string via a winder) and figuring out a way to pluck the string. Eventually the aim would be to make an instrument which could be played remotely.
I was also inspired by hand-made instruments which utilise scrap parts, such as cigar-box guitars and fingers pianos.
Design
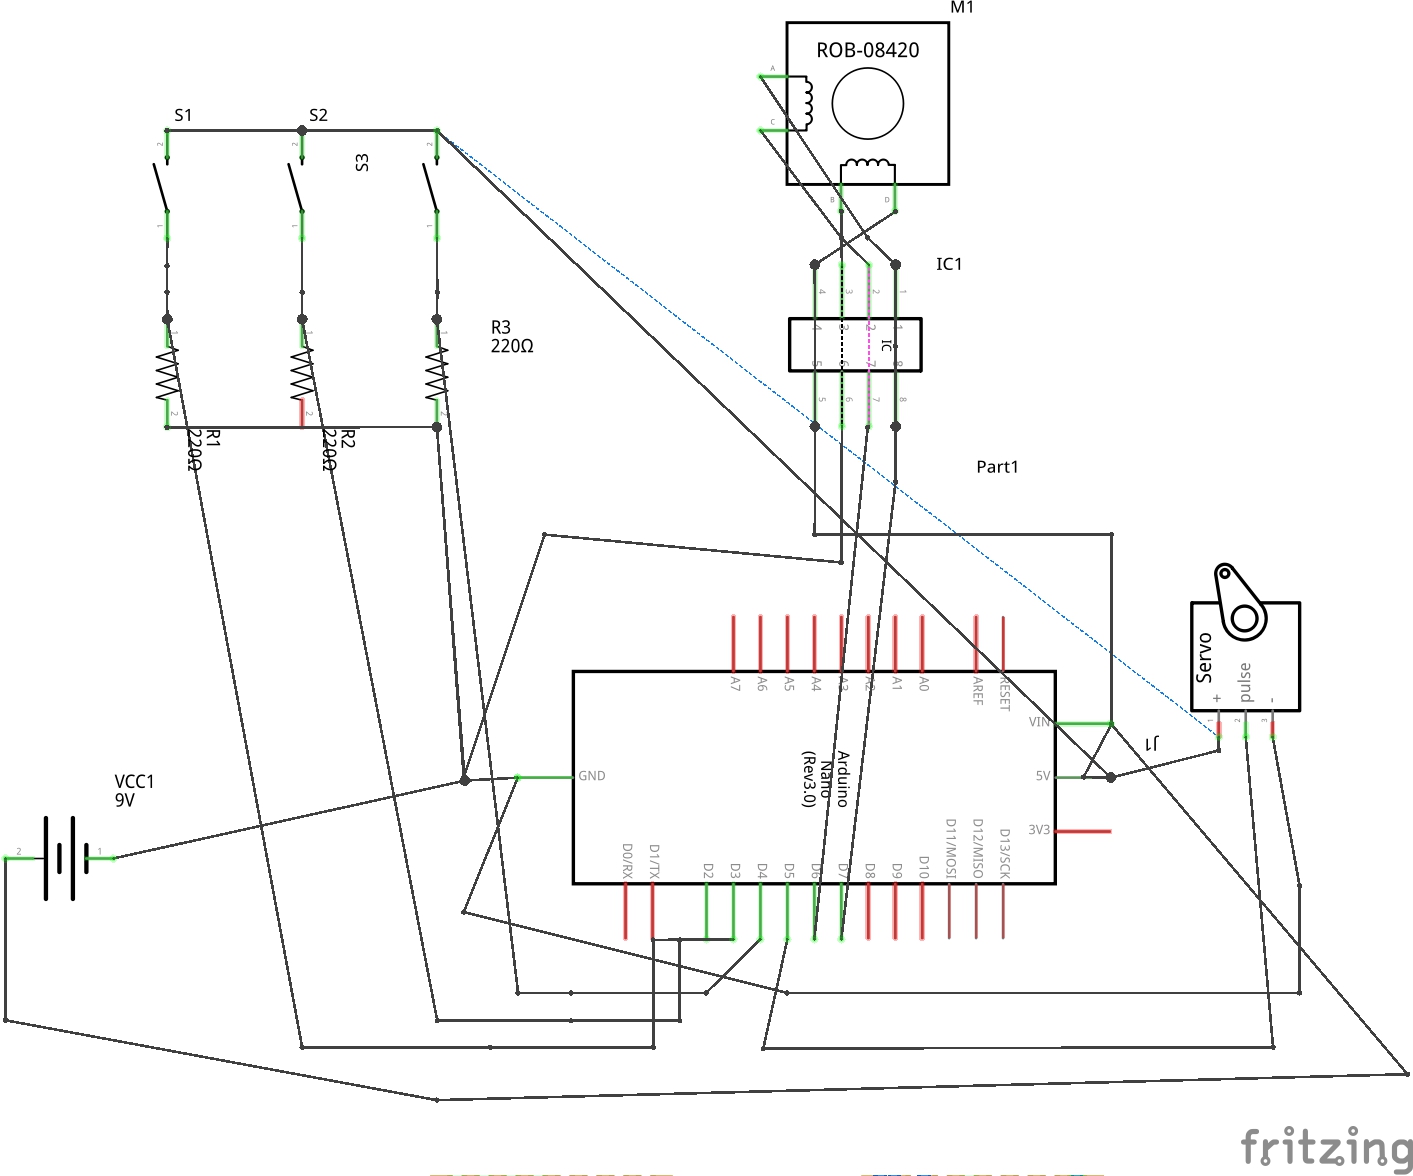
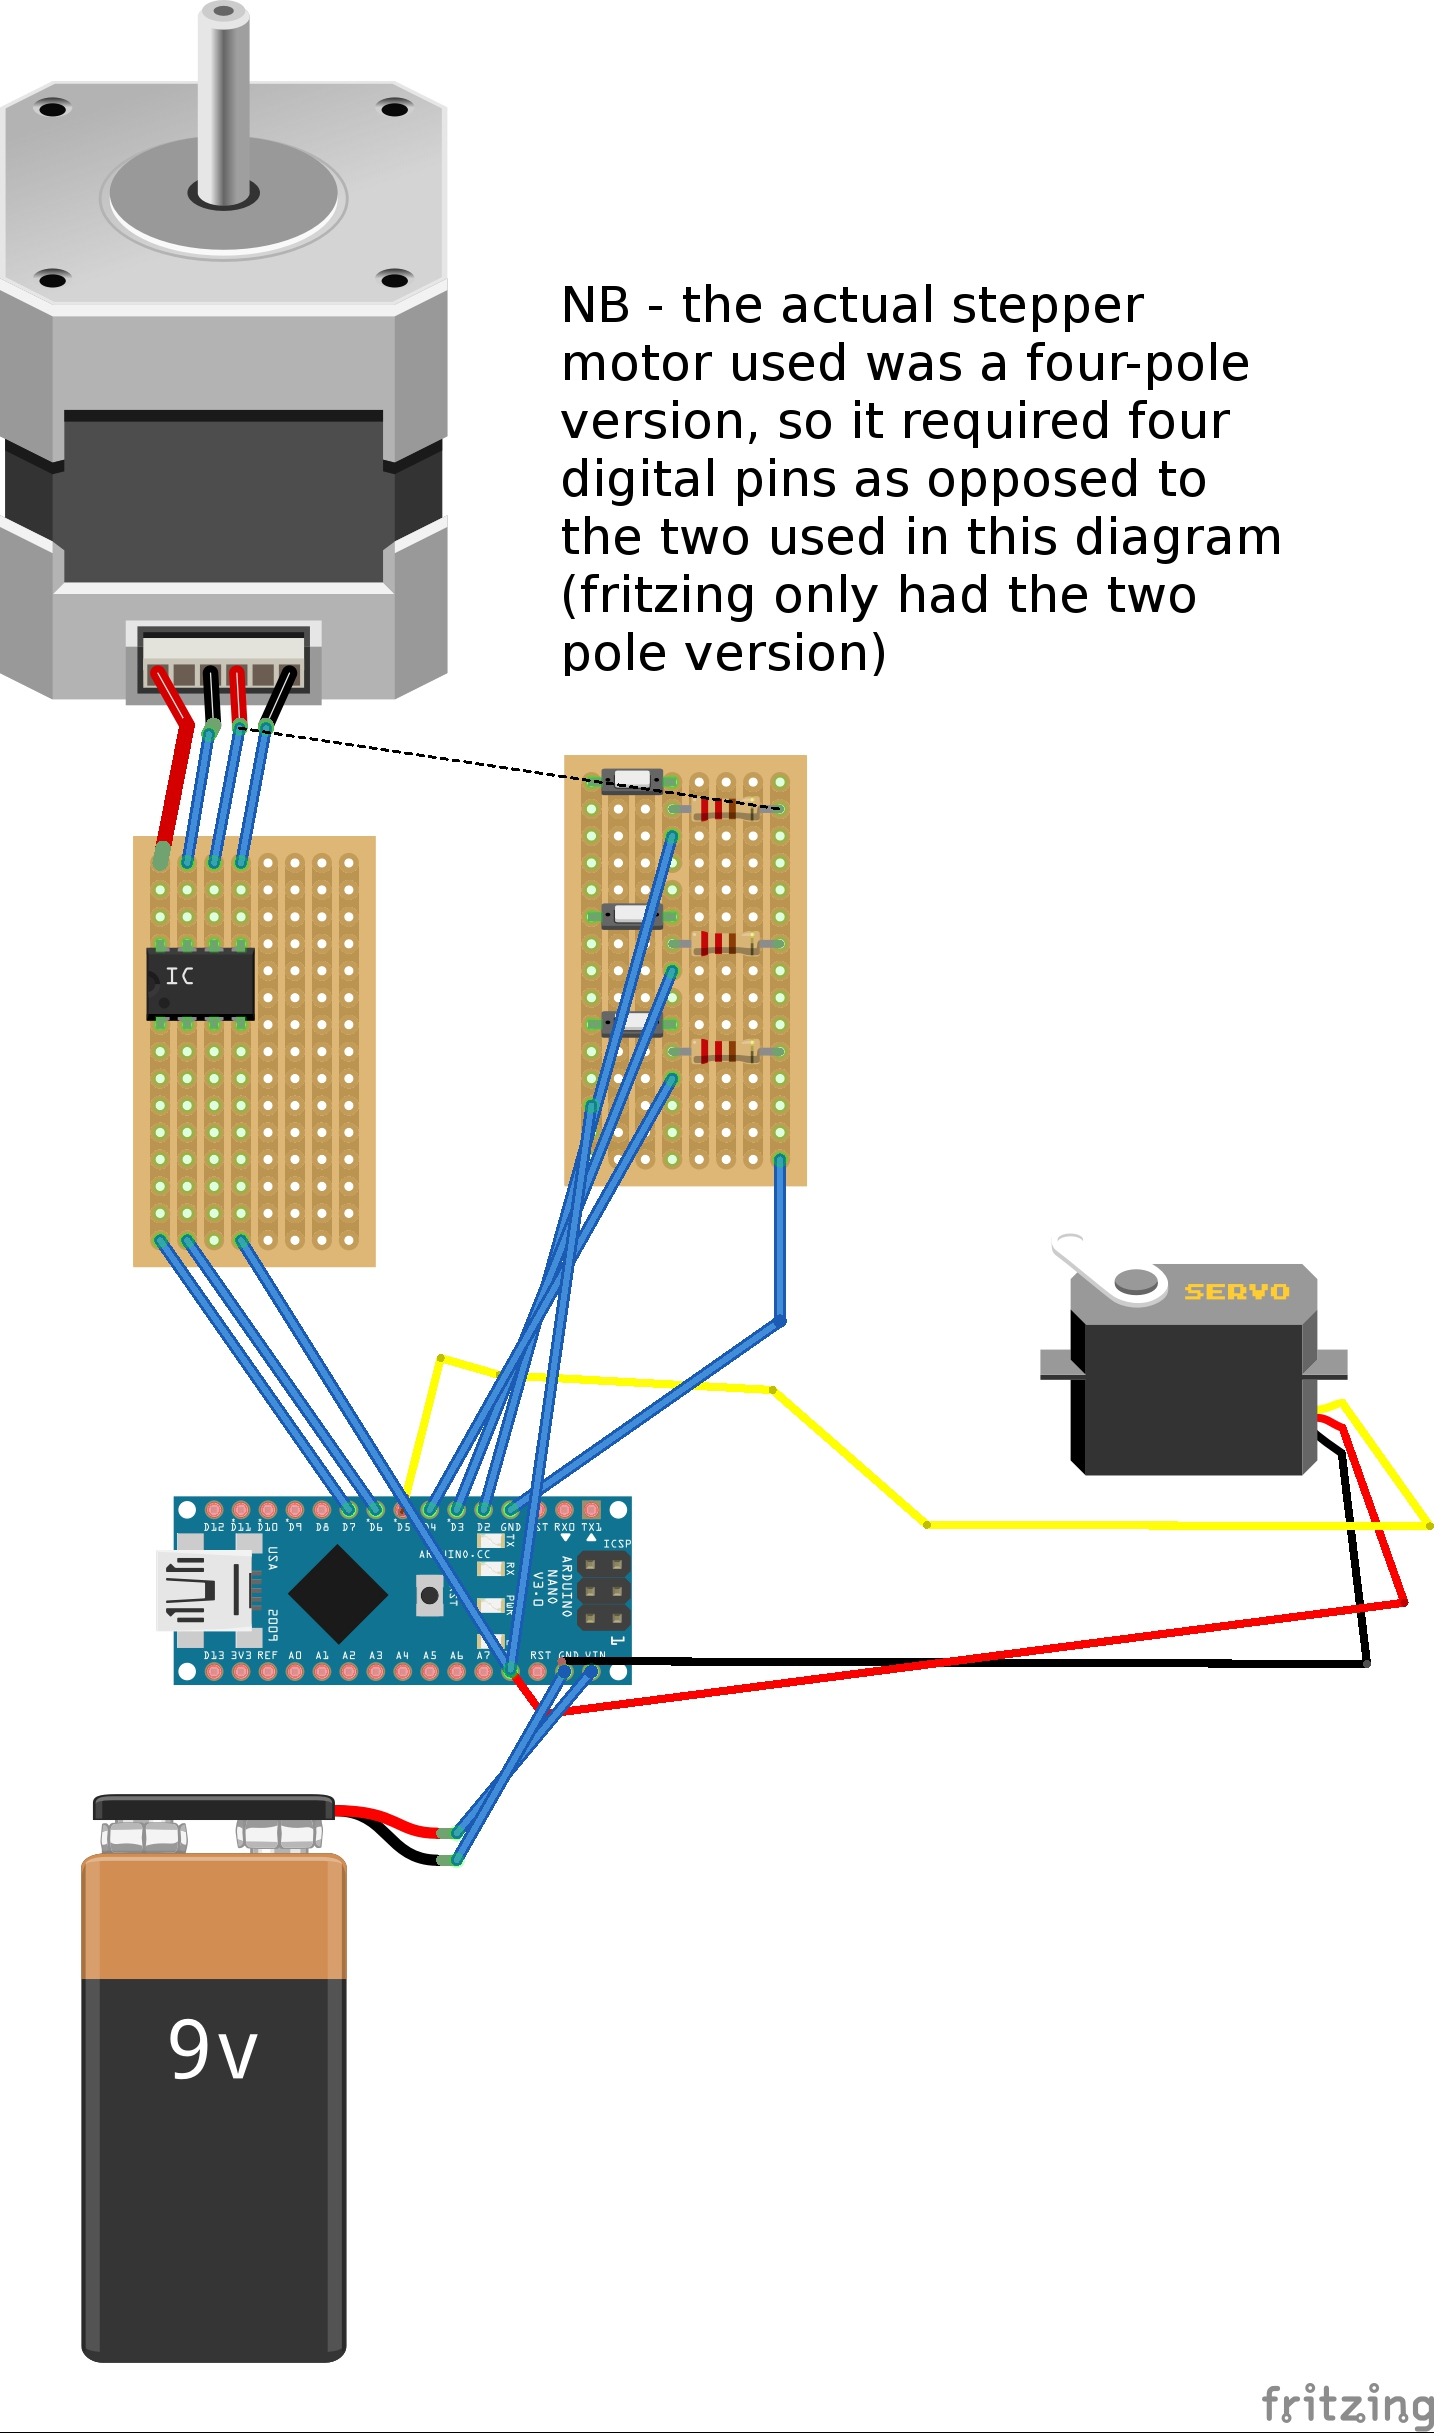
The inputs and outputs for this project did not change that much from the initial conception – I maintined the three button, two motor configuration throughout. Once I had set up the circuit on a breadboard, the code which encapsulated both motors and the three switches only underwent minor changes. These were things like setting the angle for the servo motor, and setting the speed and number of steps for the stepper motor.
The enclosure for the device however went through several phases. The mechanical considerations of this project would prove the biggest challenge.
https://www.youtube.com/watch?v=BymMvH7zc4A
Prototype one
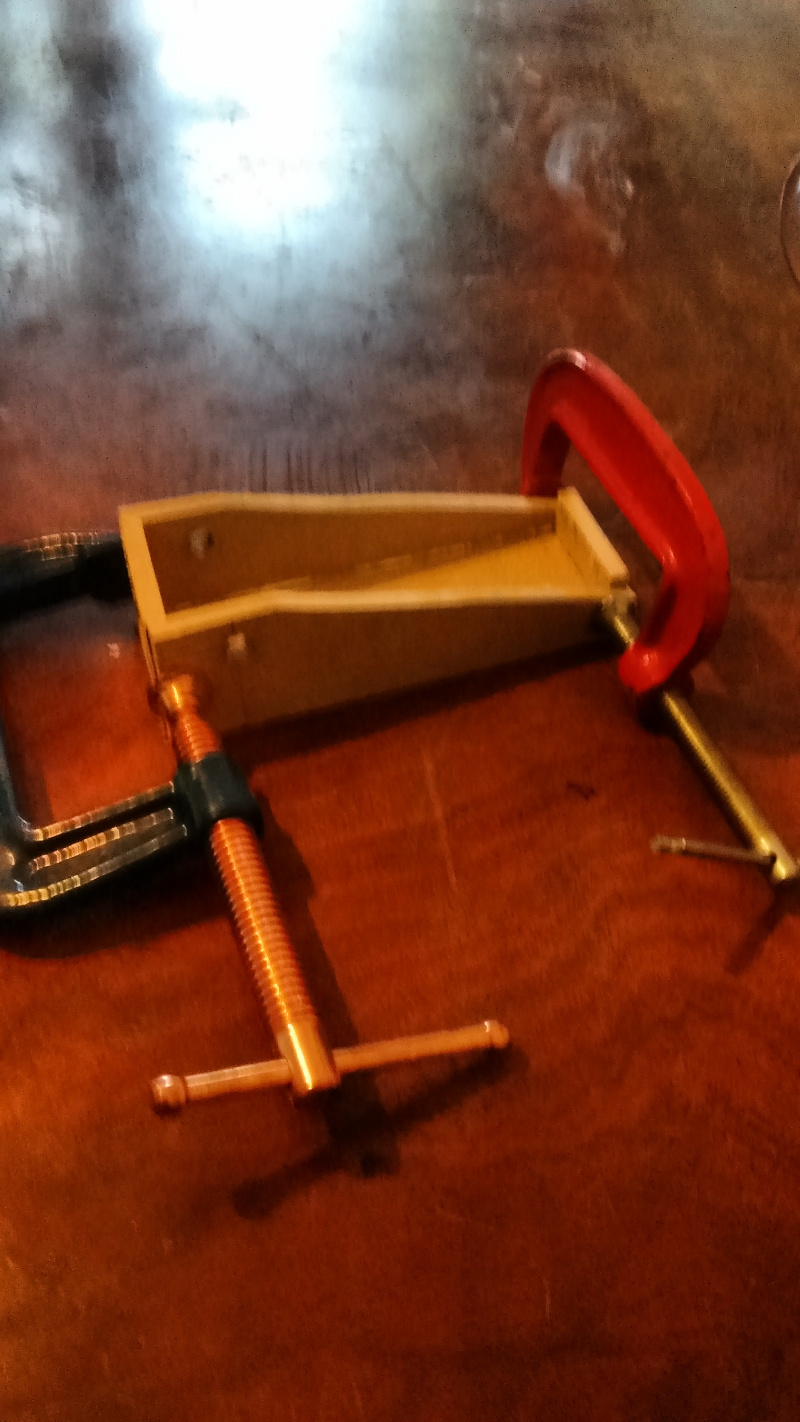
The original prototype was a small wooden open-box type design. This was cut by hand from mdf with a jig saw and a drill. This was built mainly to test the capability of the stepper motor – if it had enough torque to tension a faily thing metal string. There was no servo ‘plectrum’ at this stage.
https://www.youtube.com/watch?v=Syn2Oycfe28
Prototype two
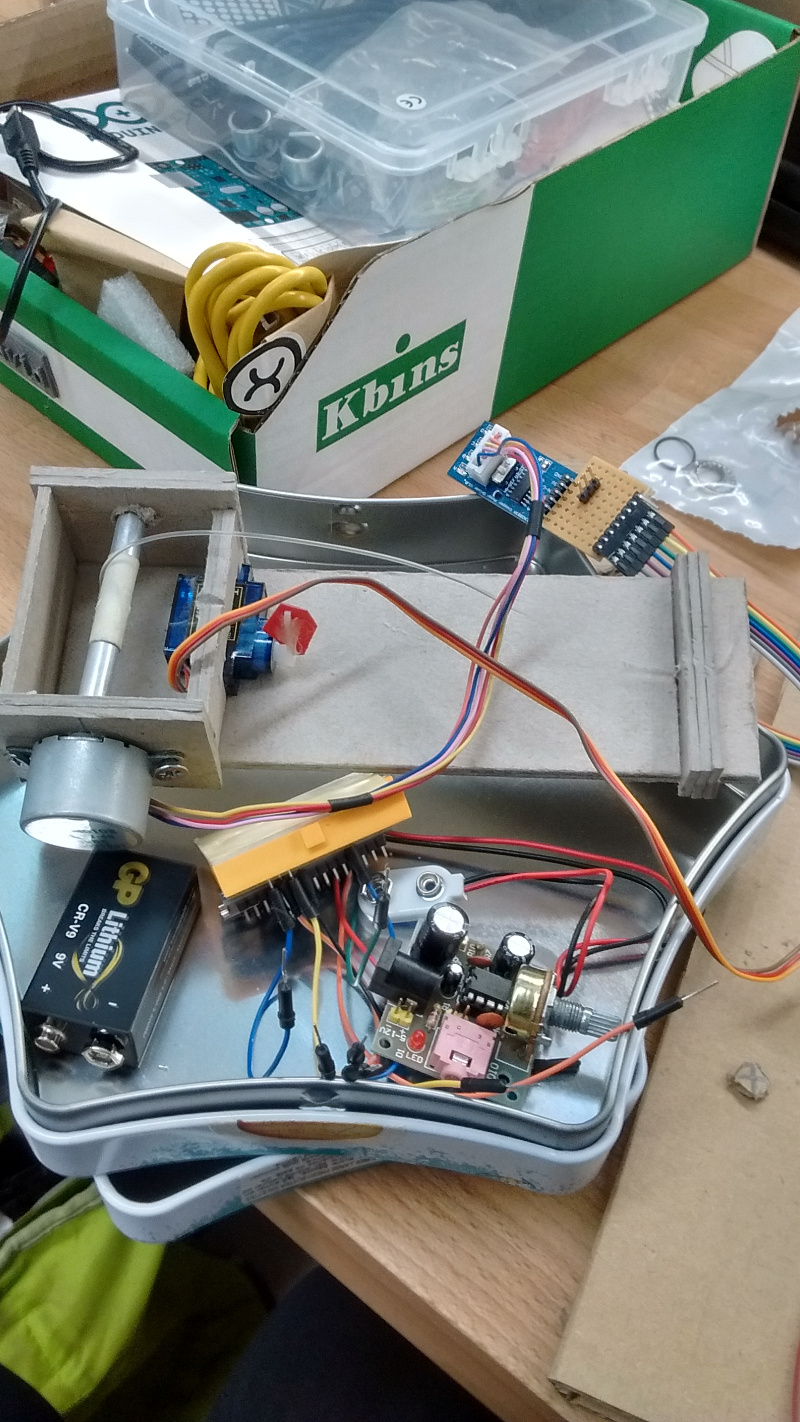
The second prototype was built with all of the parts in mind and I hoped to house it in a biscuit tin.
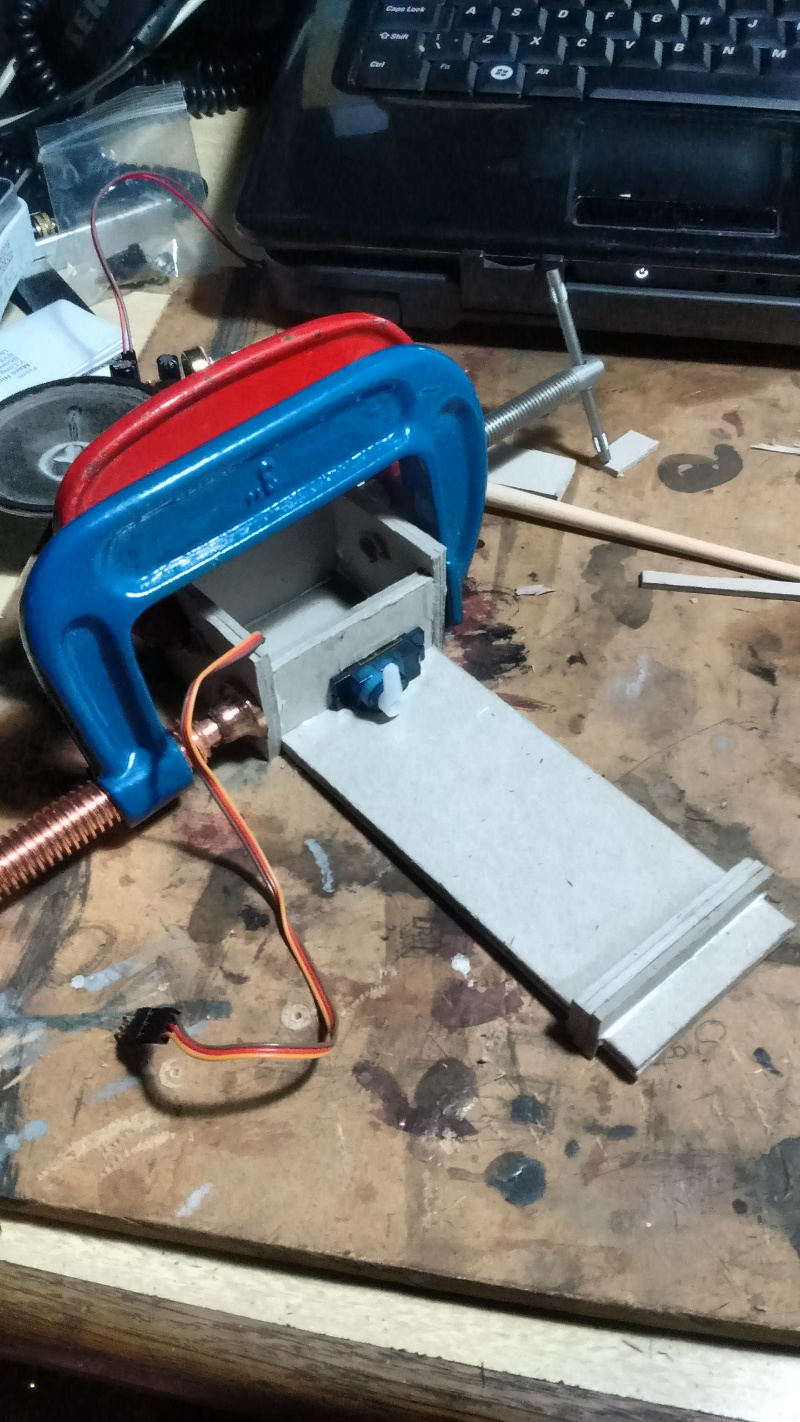
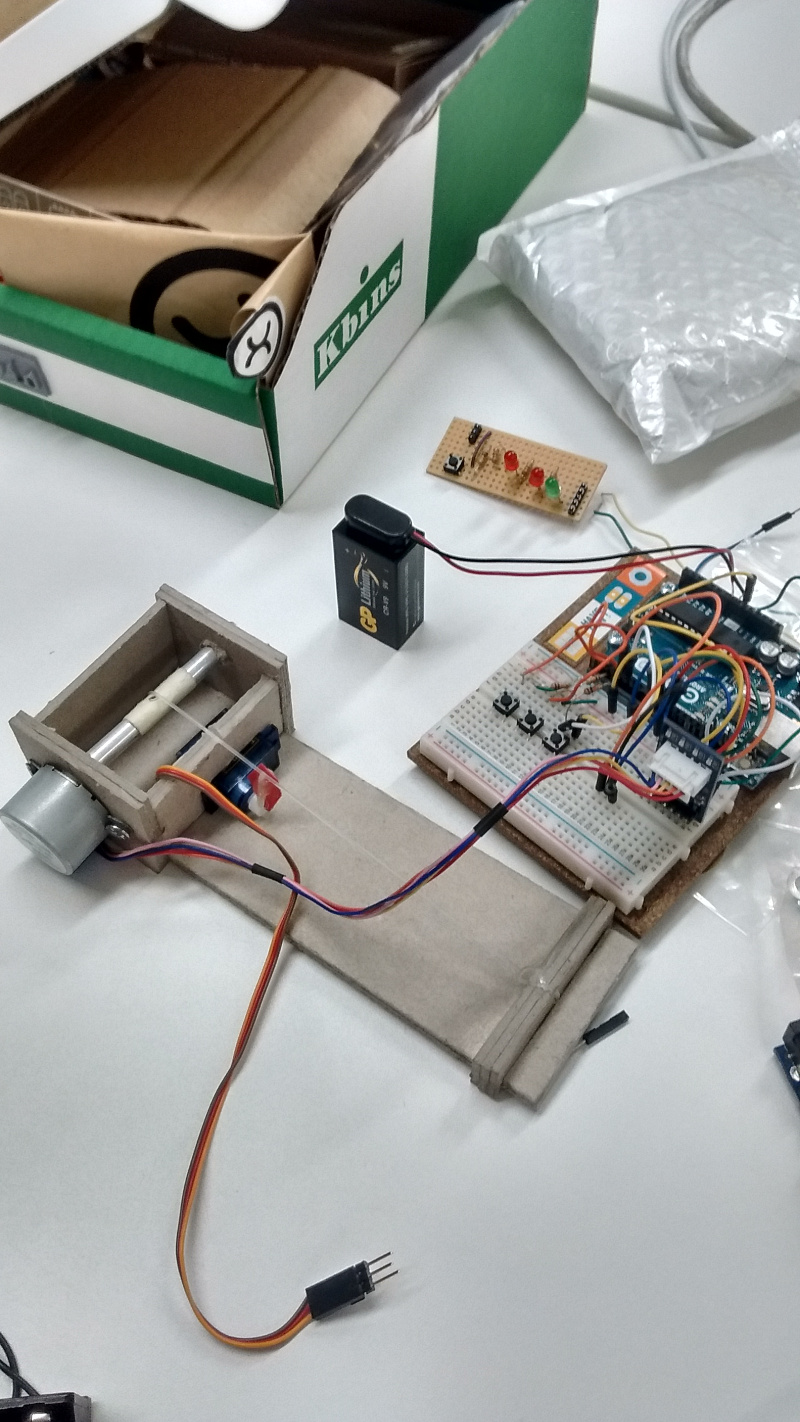
I built the base structure from thick greyboard and glue – it was strong enough to take screws and house all the parts but also easy to dis-assemble, as well as easy to cut for ad-hoc fabrication. The resulting structure ended up being ugly if not utilitarian – I had designed it to fit in the box with the lid closed. However, when all of the additional components were added, such as the driver for the stepper and the arduino board itself, it proved to be too much of a tight squeeze!
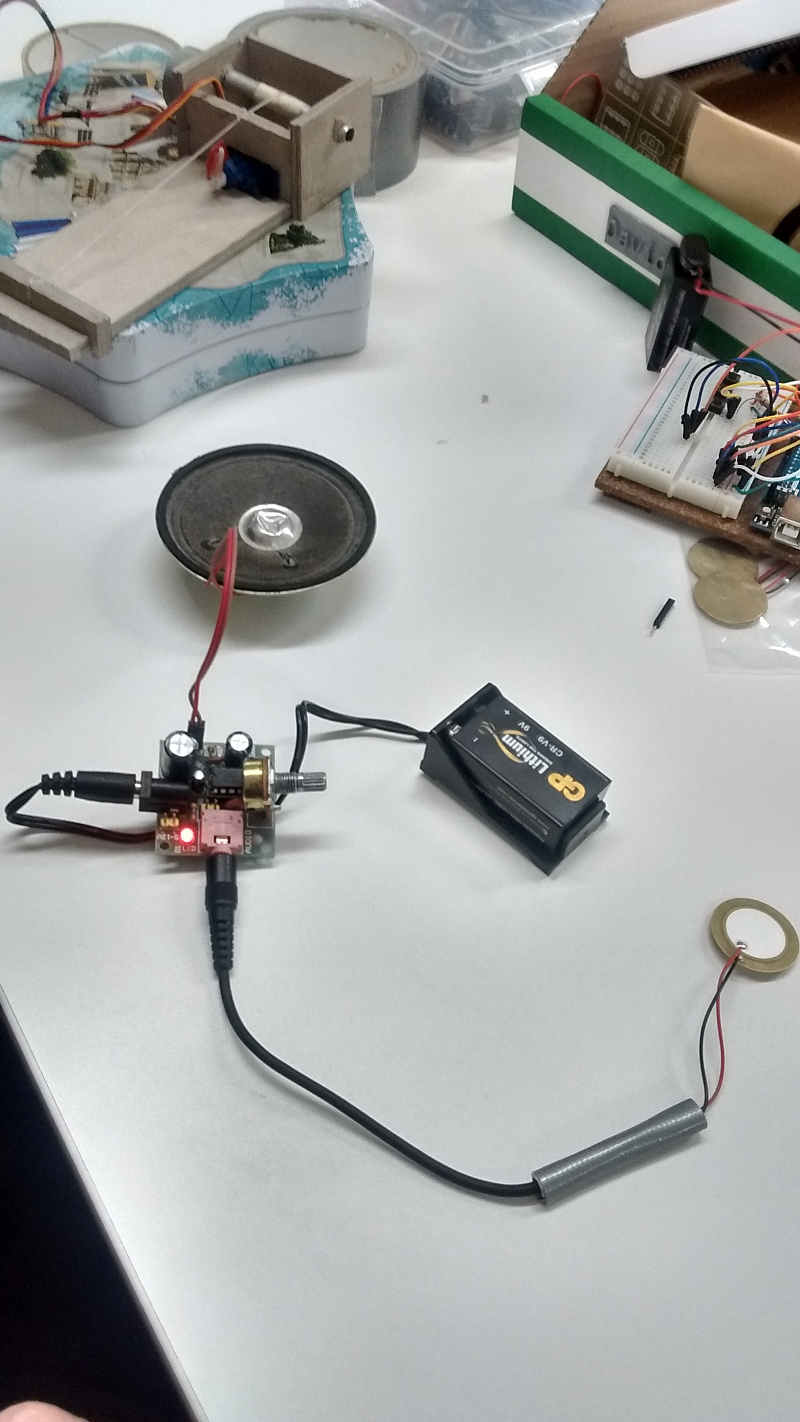
At this stage I also wanted to see if I could construct a piezo microphone, following instructions from ‘Handmade electronic music’ by Nicolas Collins (2006).
For this I cheated a bit and bought a small powered mono-amplifier. The piezo was connected to this via a 3.5mm mono-jack, which then powered a small 2.5 watt speaker. This addition of course also cost valuable space within the already tight enclosure. It was time to move on to something bigger...
Final design
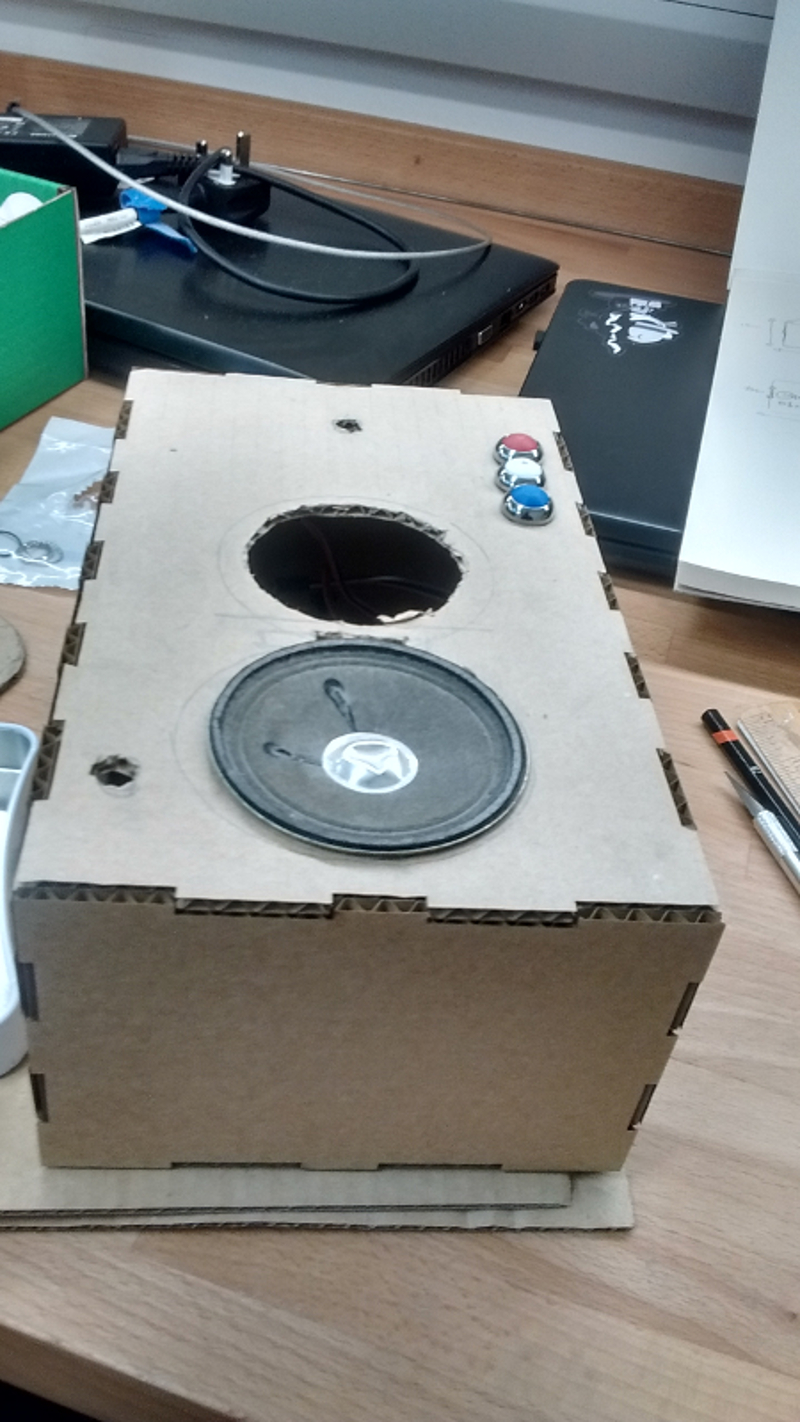
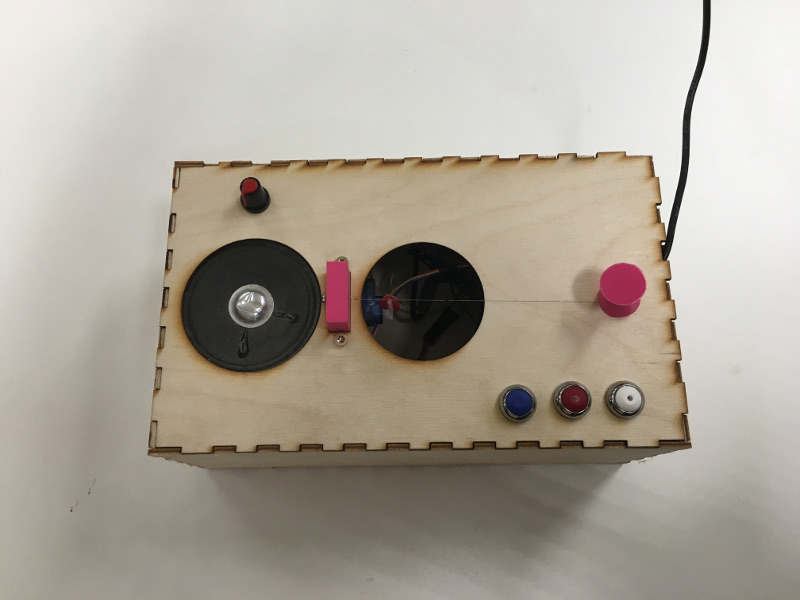
In the final iteration of the project, I decided it would be good to utilise some computer aided fabrication in the form of a laser-cut enclosure and 3D-printed parts. I also wanted to see if adding more of a ‘body’ to the design could amplify the sound of the string more effectively, in a similar way to an acousic guitar, with a sound – hole located under the string.
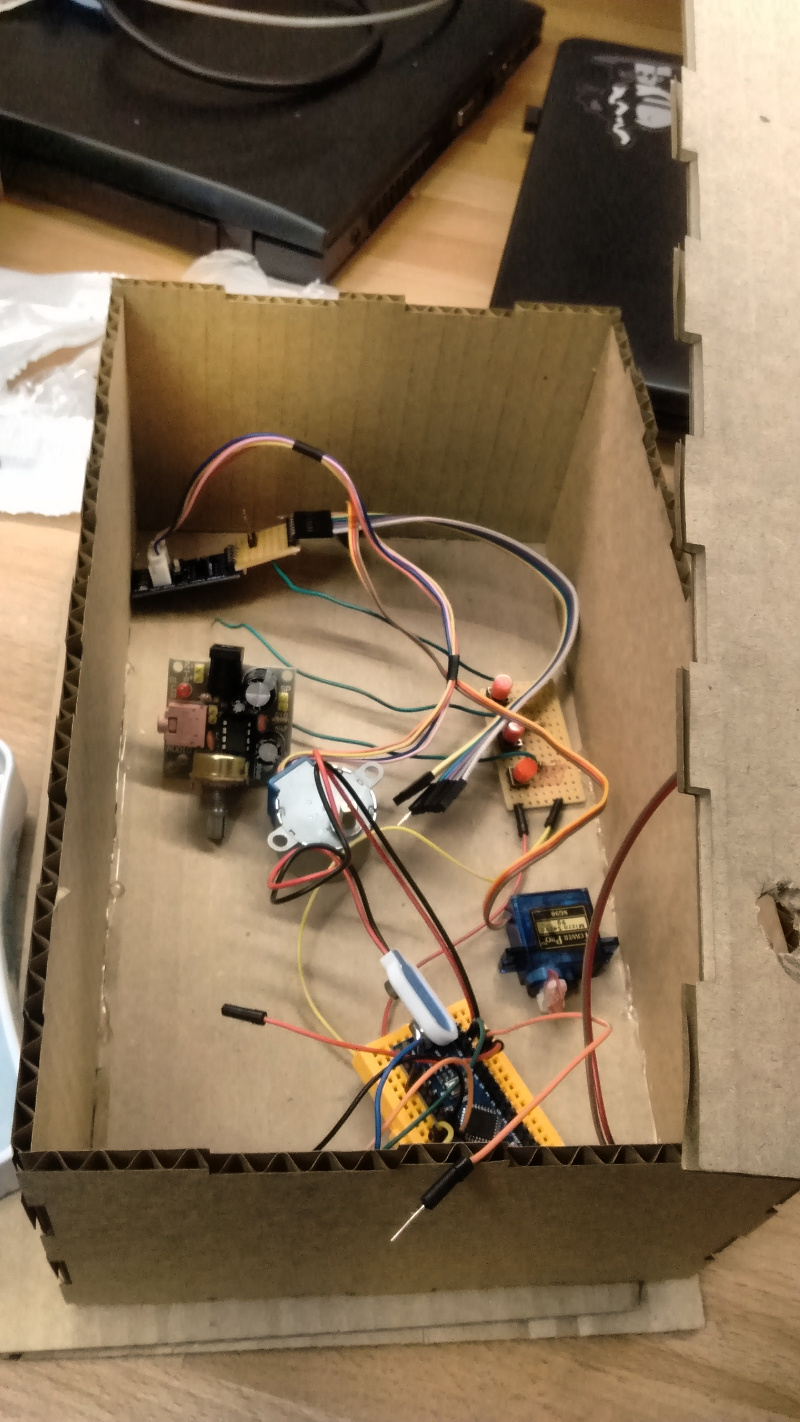
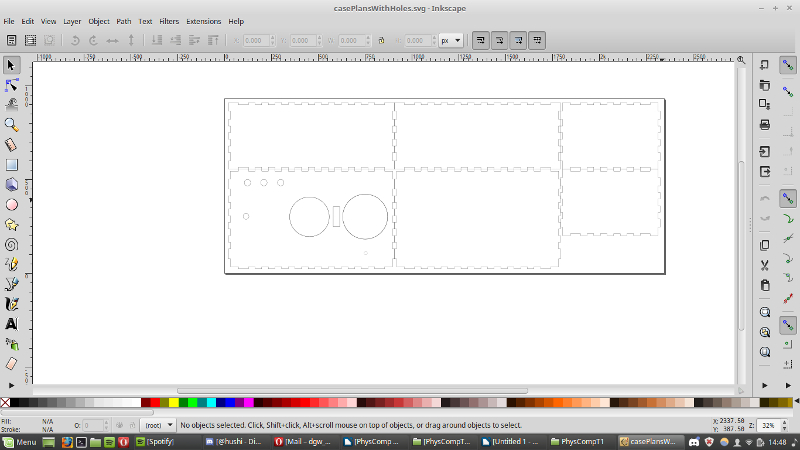
For the design of the box I utilised the ‘maker case’ online resource for designing custom boxes, and I added additional circular vector cut-outs (for this I used inkscape) for the components to sit in. This I then laser-cut, first in cardboard as a test and then in thin 3mm plywood (any thicker than this and fitting the threads for the push-buttons and the stepper-motor shaft would have been problematic).
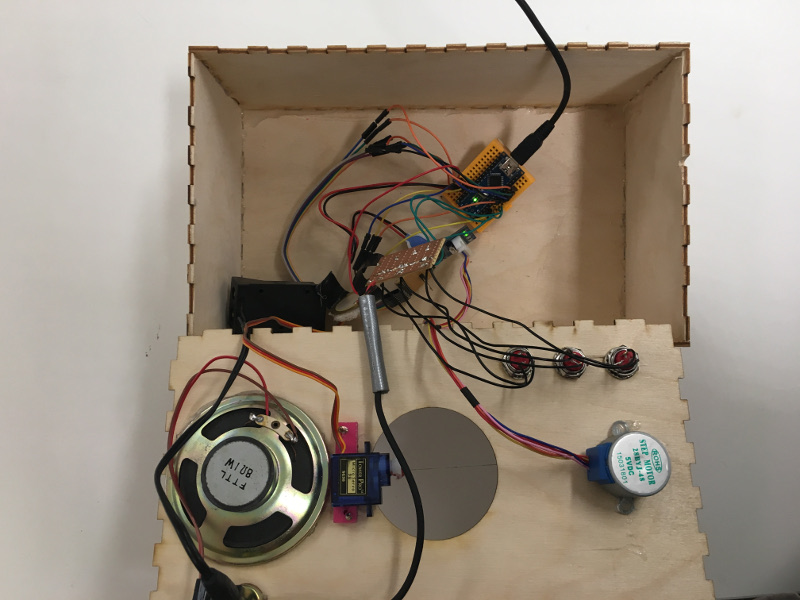
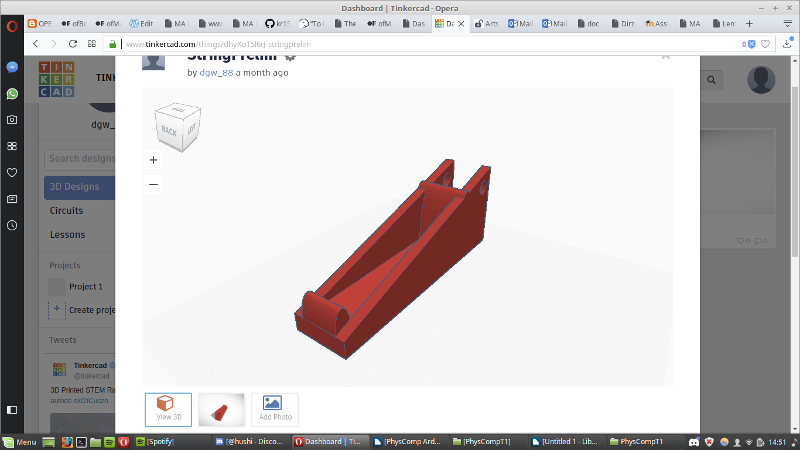
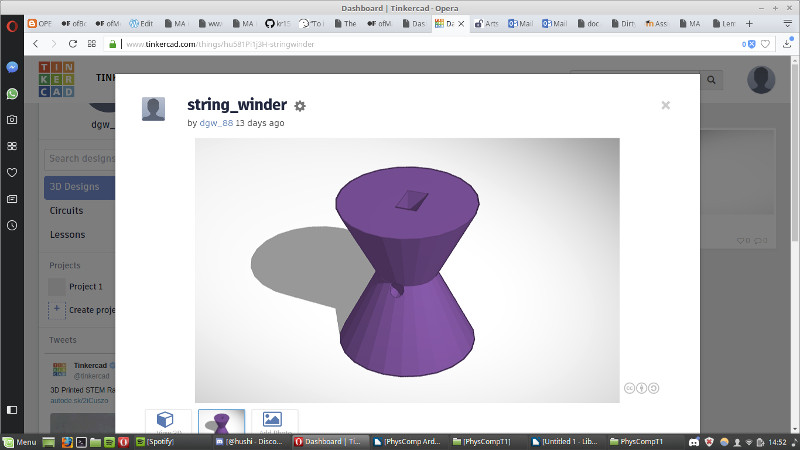
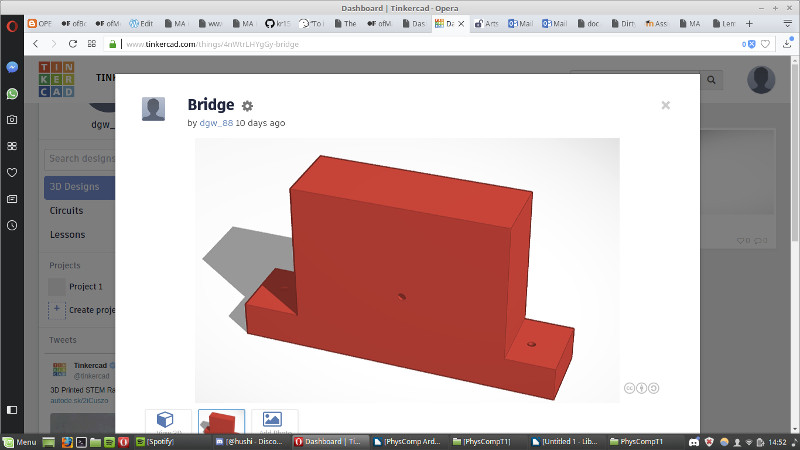
I 3D printed a winding device with a hole in the middle to take the string and a slot on the botton to take the shaft of the stepper motor. I also 3D printed a bridge, in order to take the other end of the string and to attach the servo plectrum to from the bottom. I ended up choosing a thin nickel guitar string as it had a ball-end type design and was easier to fit with my bridge design.
All of the elctronics, including the piezo-pickup and amplifier were housed inside the box, with the actual pickup itself stuck to the underside of the top panel near to the sound-hole.
Technical Considerations
It was important in the initial stages to find a motor which would have enough torque to effectively tighten a guitar string. Through using a ‘servo’ motor in previous projects, I knew that this kind of motor would not be up to the task. However, I had read about ‘stepper’ motors having a much higher torque, as well as being highly programmable in terms of speed and ‘steps’ (how much the shaft turns with the press of a button, say).
I was successful in figuring out how to make the motor turn fairly via the included examples included in the arduino IDE, however I ended up borrowing some code in order to tune the motor to my needs (I’ve credited this in the arduino code). I attempted to power it via 9V battery through the 'vin' on the arduino. This did work, but it drained the battery really fast so I had the arduino and attached motors powered via usb for the demonstration.
The second iteration of the design was also to include the addition of the servo motor which would act as a plectrum – when tested it proved to be just about strong enough for this purpose. It was quite fiddly setting the height of the plectrum in order to pluck the string properly. This was done quite crudely by sticking an actual guiar plectrum to it and then trimming it down as needed. It turns out that the motion of a human plucking a string is actually a relatively complex gesture...
The piezo pickup worked OK but it could have been louder (I would lean later of an ‘op-amp’ which could have helped with this), this small amp (powered by a 9v battery) boosted it’s signal a bit but not to a particuarly noticeable degree.
The acoustic element of the design, i.e. utilising a bigger box with a sound-hole, worked to a degree. Given more time though, I would have liked to develop this element further.
Conclusion
I was fairly happy with the final outcome, but overall I was disappointed with the sound. The piezo pickup did not amplify as I’d hoped and the acoustic effect of the box did not have a very noticeable effect.
However, I was pleased that my basic components held up to the job and that the device could effectively be ‘played’ , so in this way I fulfilled my initial intention – the plectrum was able to strike the string and made a sound, and the stepper motor worked effectively by tightening and loosening the string.
It was good to familiarise myself with some computer-aided fabrication techniques and to get a better understanding of how these two types of motor work.
Ideas for further expansion
As mentioned in the beginning, a further expansion of this project would be to network it in some way, i.e. rather than having a button to control the servo plectrum, it could instead be controlled wirelessly via a computer or with an infrared sensor, say. I'd also like to figure out the best way to power everything so that it doesn't rely on being tethered to a computer.
The winder worked well, though it did have a tendanncy to catch on the wood at times. It’s design could be modified to work more effectively with the stepper-motor shaft – the motor itself worked well in this case, but I would like to experiment with a more powerful stepper motor and see how well this would work with thicker (i.e. stronger) strings.
It would also be good to further refine the plucking sytem in a way which could allow for the incorporation of additional strings. The servo motor worked OK, but a stepper may well be more fit for purpose, especially if it had to pluck thicker strings.
I would also like to see if it is possible to utilise an op-amp to boost the signal of the piezo pickup, or even to experiment with different kinds of amplification (diaphragm mics, coiled guitar pickups etc.).
References
Piezo pickups and lots of other great stuff: http://www.nicolascollins.com/handmade.htm
Data sheet for the four-pole stepper motor: http://robocraft.ru/files/datasheet/28BYJ-48.pdf
Thank you to Joe Fuentes at: https://hackaday.io/project/12423-arduino-controlling-stepper-motor-with-buttons
Some examples of hand-made stringed instruments: https://www.youtube.com/watch?v=ImeQl7kfpVI
https://www.youtube.com/watch?v=5sayxVovKjQ
https://www.youtube.com/watch?v=xSnZRg8Ei50https://www.youtube.com/watch?v=xSnZRg8Ei50


